Saturday, January 31, 2009

Dashi - Japanese Soup Stock with Shiitake and Kombu

I am making Dashi (Japanese Soup Stock) tonight. I always use "Mizudashi" method which is to make Dashi by soaking dried ingredients in water overnight. I am using Dried Shiitake Mushroom and Kombu (kelp) tonight. If you have Dried Shiitake only, that will work also. Kombu only is good, too. Katsuobushi (bonito flakes) works well also.


What I used:
  • 3 pieces of Dried Shiitake Mushrooms
  • 1 piece of Kombu (Kelp cut down to about 4 inches)
  • 3 cups of water

Rinse the Dried Shiitake Mushrooms. Wipe Kombu with dump paper towel. Put them in a bowl with 3 cups of water and let them soak overnight (8 hours or more) in a refrigerator.

The stock will be ready to use by the morning. I squeeze water out of Shiitake and Kombu and put them aside to be used for other recipes later on.

I am thinking about making "something Japanese" tomorrow, but not sure what. I will post whatever I decided to make tomorrow!

Okara Nuggets with Hijiki and Carrot trial

I made some soymilk today, so I got more Okara (soy pulp). Since the Okara Falafel I made last week was a big success, I decided to make something similar. Instead of putting parsley and garlic, I put Hijiki and carrots. My daughter liked it. I thought they are so so. I think everything taste good to my daughter if they are fried and with sweet chili sauce....

What I used:
  • 2 cups of Okara
  • 1/2 onion - finely chopped
  • 2 tablespoons Hijiki
  • 1/2 cup Carrots - finely chopped
  • 1/3 cup Flour
I washed and drained Hijiki (I didn't soak it in water, since my Okara is pretty moiste), then mixed all the ingredients together and fried them for 5 to 7 minutes with 350 degrees F oil.

Hijiki is a brown sea vegetable growing wild on rocky coastlines. It is known to be rich in dietary fibre and essential minerals such as calcium(1400mg/100g),iron(55.0mg/100g) and magnesium(620mg/100g).

Next time, I might add green onions instead of regular onion, and maybe shelled edamame in the dough....

Please leave me a comment and tell me how you liked the recipe! Please try out my other Okara Recipes also!

Homemade Pizza Party!

Since I had a big success with Pita Breads, I decided to try making my own Pizza dough. Actually the recipe was almost exactly the same as the Pita Bread Recipe I used. I decided to let the dough rise twice instead of once after reviewing different recipes on Internet. I got premade Pizza Sauce, Pepperoni, mozzarella cheese, and 6 screaming girls. The party was a big success!

Thursday, January 29, 2009

An Kibi Dango - Millet Dumplings with Sweet Red Bean Paste Topping

I'm not sure if I can call this a recipe.... I just pour my homemade Anko over Kibidango, It was great!


Please check my other posts for Japanese Desserts also! If you have a chance to try out any of the recipes, please let me know how you liked it.

Oshiruko with Kibidango - Sweet Red Bean Soup with Millet Dumplings

Traditionally, Oshiruko is made with Mochi or Shiratama (both of them are rice cakes - one made from steamed rice, the other made from sweet rice flour). I just replaced Mochi with my homemade Kibidango (Millet Dumpling).

You will need:
  • 1/2 cup Anko (sweet red bean paste)
  • 2 cups of water
  • 6 Kibidango (Millet Dumplings)
1. Mix Anko and water in a pan and bring them to boil.

2. Stir the mixture till Anko is all desolved. Add Kibidango and simmer for a couple minutes.

You can use more/less Anko to adjust the sweetness to your liking.

Please check out my Mochi recipe! Please check my other posts for Japanese Desserts also! If you have a chance to try out any of the recipes, please let me know how you liked it.

Anko - Sweet Red Bean Paste

I recently found out that the small red beans are the number one antioxidant-rich food. Red beans happened to be one of my favorite foods. Many traditional Japanese sweets are made with Anko (sweet red bean paste). My husband hates it, my daughter and I love it....

Here is the recipe I use to make them. Many people suggest to boil the beans once and change water to make the paste tastier, but I don't do that because I don't want to drain out nutrients along with the water.

You will need:
  • 1 cup of small red beans (Adzuki Beans)
  • 1 cup of brown sugar
1. Wash the beans in a pot. Cover them with enough water and slowly bring them to a boil.

2. Let it simmer for 3 to 4 hours or until the beans are soft. Make sure you have enough water for the whole time. (You can soak the beans overnight and cut down the cooking time to 1 to 2 hours.)

3. Add suger 1/4 cup at a time over 10 minutes once beans are soft.

4. Simmer more until water is almost gone. Beans will soak up more water after you stop cooking, so make sure you take them off of the burner while it is still somewhat runny.

That's it! You can use this paste to make Oshiruko (sweet red bean soup), as a topping for Mochi (rice cake), and for many other dishes! Please check my other posts for Japanese Desserts also! If you have a chance to try out any of the recipes, please let me know how you liked it.

Kibidango - Millet Dumplings

I was reading an old Japanese folk tale - Momotaro - to my daughter the other night. The main character fights with ogres in the story. When he told his mom that he is going to fight with ogres, his mom made Kibidango (Millet Dumplings) for him to take....

You will need:
  • 1 cup of Millet
  • 2 to 3 cups of water
It takes about 25 minutes to cook millet by simmering. I like grainy dumplings so I use 2 cups of water, but you can add more water to make it more mashed potatoes like texture. Once it's done, you mash it and form them into 1/2 inch balls. You get about 40 of them.

I made two dishes using the dumplings - Oshiruko (Sweet Red Bean Soup with Dumplings) and An Dango (Dumplings with Sweet Red Bean Paste Topping) - and put the rest in a freezer!

Monday, January 26, 2009

Okara Falafel Recipe!

Okara Falafel Recipe using Soy Pulp from your homemade Soymilk! I was driving when I thought about making Falafels out of Okara (soy pulp you get when you make soymilk). I thought I was a genius when I came up with the idea. Then I went home and typed "Okara Falafel" on internet; sure enough there were many of them. Here is the recipe I came up with after reviewing many different recipes.


You will need:
  • 2 cups of Okara
  • 1 large onion, finely chopped
  • 4 cloves of garlic, finely chopped
  • 1 cup of fresh parsley, finely chopped
  • 1 teaspoon Cumin
  • 3/4 cup of wholewheat flour
  • 1 teaspoon Salt
  • 1/4 teaspoon Pepper
  • Oil for frying
1. Mix all the ingredients except the oil in a large bowl.

2. Heat 2 inches of oil to 350 degrees F.

3. Scoop the mixture with a dinner spoon and drop them into the oil one at a time.

4. Fry them for 4 to 7 minute.

The result was great! I tried hummus, sweet chili sauce, and tonkatsu sauce for dipping, and all of them were pretty good. I liked sweet chili sauce dipping better than others! Please let me know what you think about the recipe! I am thinking about adding Hijiki and Carrots next time to make it more like Ganmodoki.

Please leave me a comment and tell me how you liked the recipe! Please try out my other Okara Recipes also!

Sunday, January 25, 2009

Furikake on your Rice!

Furikake Recipe! Have you ever had your Japanese friend tell you that you can't pour Soy Sauce over your rice and got embarrassed? Have you ever thought the Japanese style cooked white rice is little too blunt for your taste? Here is the secret! Not every Japanese people eat their rice straight. Many of them put "Furikake" on their Rice!


Furikake is any dry Japanese condiment meant to be sprinkled on top of rice. The main ingredients for most of the Furikakes are Sesame Seeds and Salts. Some of them consists dried and ground fish, eggs, vegetables, etc. Here is my basic Furikake Recipe I use at my house.

You will need:
  • 3 tablespoons Sesame Seeds
  • 1 tablespoon Salts
  • 1 sheet Roasted Seaweed (Yakinori)
1. Tear up the roasted seaweed roughly into small pieces.

2. Put all the ingredients in to a food processor and grind them together for 1 to 2 minutes, or until the mixture resemble the photo above.

Please let me know what you think! I am thinking about adding chili peppers for my next batch.


Saturday, January 24, 2009

Webkinz' New Cloths

My daughter was sick and stayed home for a couple of days last week. We were looking for things to do, and decided to go to a craft store and see if we can get something exciting.

I am not sure if everyone knows what Webkinz pets are. They are stuffed animals that each come with a unique Secret Code. With it you can go to the company's website and take care of your pet virtually. You can go to their website if you are interested.

My daughter who just turned 9 has been really into this Webkinz for a while now. She takes them to her friend's house and visit their Webkinz pets to have "Webkinz Play Date". They also communicate over Internet with each other through their Webkinz pets (parents can decide the level of access their kids can have - you can set it so kids can only use preset phrases from the list website offers).

Anyway, we went to a craft shop and found that their remnants are 50% off of already discounted prices! We purchased about $2.00 worth of remnants, and above photo is the result of the purchase!


Wednesday, January 21, 2009

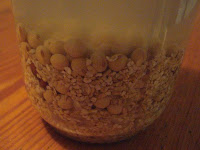
Best Homemade Soymilk!

Soymilk Recipe! I finally did it. I've been thinking about trying for a long time, but wasn't sure if it was worth it to actually make homemade soymilk. It turned out to be pretty easy, and the end result was AMAZING! Try it out!

You will need:
  • 1/2 cup Soy Beans
  • 2 tablespoons Brown Rice
  • 2 tablespoons Steel Cut Oat
  • 2 cups Water
  • 64 ounces Water
  • 1/8 teaspoon Cinnamon
  • a pinch of Clove
  • a pinch of Nutmeg
  • 2 tablespoons Brown Sugar
  • 1/4 teaspoon Salt
  • 1/4 teaspoon Vanilla Essence
1. Mix Soy Beans, Brown Rice, and Steel Cut Oat in a small bowl. Wash & drain. Add 2 cups of water and soak them overnight.

2. Put the mixture in a food processor and blend till it becomes creamy.

3. Boil 64 oz of water in a big pot and put the creamy soy mix in, let it simmer for 30 to 40 minutes.

4. Add rest of the ingredients and strain.

You now have 64 oz of Homemade Soymilk!

Believe me, it does not taste like eggnog. If you want "easy" soymilk, you can just use soy and water. Just experiment. The spices just lightly musk the beany taste. I tried cheesecloth to strain the milk, but it didn't work so well. If you don't mind some soy bits in your milk, you can just use a fine metal strainer and it works fine. It is a lot cheaper than store bought soymilk even with all organic ingredients and I think it taste better! Let me know what you think!

* I had to update the amount of sugar after many complaints from my daughter and husband. I guess not everybody likes to taste the beans....

Hummus with Olives!

Hummus Recipe! I love hummus! I went to Egypt last year and ate hummus for breakfast, lunch, and for dinner for 10 days and still didn't get tired of them. Actually, I started making my own after the trip. Here is my basic hummus recipe. Please enjoy!

You will need:
  • 1 can of garbanzo beans (or 1/2 cup of dried garbanzo beans soaked overnight and cooked for 1 1/2 hour)
  • 3 to 4 gloves of garlic
  • 10 to 12 olives (Spanish olives, kalamata olives, garlic stuffed olives, any type of olives!)
  • 2 tablespoons of olive oil
  • 2 tablespoons of lemon juice
  • 1/4 teaspoon of cumin
  • 1/8 teaspoon of paprika
  • 1/8 teaspoon of salt

1. Put all the ingredients in a food processor and blend them until they are creamy!

That's it!

You can add more olives if you like Tapenade; add more cumin and paprika if you like spicy hummus. Experiment and have fun! Check out my Pita Bread Recipe also. Homemade hummus with homemade pita breads....yum!

Tuesday, January 20, 2009

Baking Pita Bread!

Pita Bread Recipe to try out! I am baking Pita Breads today. They are so easy to make and taste a lot better than store bought! The bread qualify for a frugal item in my book, since you can use all organic ingredients and it still costs about the same as regular Pita Bread. Here is the recipe if you want to try!

You will need:
  • 1 package of yeast
  • 1/2 cup of warm water
  • 1 teaspoon of granulated sugar
  • 3 cups of all purpose flour (I use whole wheat flour)
  • 1 teaspoon of salt
  • 1 cup of warm water
1. Dissolve yeast & sugar in 1/2 cup water. Let it rise for 10 to 15 minutes. It is ready when it looks frothy.

2. Combine flour & salt in a large bowl and pour the yeast mixture. Mix it with a spatula. Add 1 cup of water gradually and keep mixing. Once all the ingredients are mixed, knead the dough for 10 to 15 minutes. The dough will be less sticky and becomes easy to manage when it's done.

3. Coat large bowl w/oil. Put the dough and let it rise for 3 hours or till the size of the dough doubles. I use clock pot for this in "warm" setting. It works pretty well!

4. Roll out in a rope, cut them with knife into 10 to 12 small pieces. Roll them into balls and let them rest covered for 10 minutes.

5. Heat oven to 500 F. Place a rack at the bottom and pre-heat baking sheet at the same time. You are trying to recreate a middle eastern style brick oven!

6. Roll out the doughs and make thin circles. Place them on the pre-heated baking sheet 2 to 3 at a time. Bake one side 3 to 4 minutes or until the dough puffs up, turn it over and bake a couple of minutes more. Put the bread immediately in a storage bag once baked.


I like really thin Pita Breads, but my husband likes thicker chewier Pitas better... By storing them right away, you keep them soft and moist! Check out my Hummus Recipe and enjoy them together!